

Volvo P1800 early B18 rebuild

So…you have a tired engine. Easy, just rebuild it…right? If you are handy, just disassemble the engine, send out the critical parts to the machine shop and have them do the work and you can re-assemble. Alternatively, they will do all the work, it’s just going to hurt your checkbook some more.
However, just like gas stations, machine shops are disappearing at an alarming rate! Also, I can’t find a shop that can work on my VHS Video player! What’s up with that??!!
I predict that automotive machine shops will be pretty much gone within ten years. Majority of independent machine shops left today are owned and operated by an “old guy”. In his head there is a lifetime of knowledge on how to properly bore an Hemi engine or how to do a three angle job on your valve seats. I don’t see any young people wanting to take over so when the old guy goes fishing (or worse) , that knowledge goes with him. I am saying “him” as I have yet to meet any female shop owners but I am sure there are some.
I got the dreaded call from a friend who also frequent my favorite shop. “Hey, if you need any work done, hurry up, Gary is retiring”
I have been lucky, I haven’t needed any engines rebuilt since I restored a 1968 Oldsmobile 4-4-2 in 1985! All my cars since then have had good running engines so why bother. My current 1967 122S wagon had 80,000 mile on a rebuild when I purchased it 15 years ago. I doubt I will wear that engine out in my lifetime!…and I have two spare engines. Excellent paperweights!
However, I am doing a full resto of an early 1961 P1800. After several life interruptions I am ready to get back on the sheet metal work. I have hundreds of hours of metal work in front of me so rebuilding the engine was the furthest thing on my mind. However, this phone call changed my priorities. Like the boxer said: you gotta roll with the punches”

The engine was installed on a rotating engine stand for easy access. Here you can see the oil cooler that was present on the early cars.
They are actually not needed today with the better oils. I certainly will keep it as it is stock.
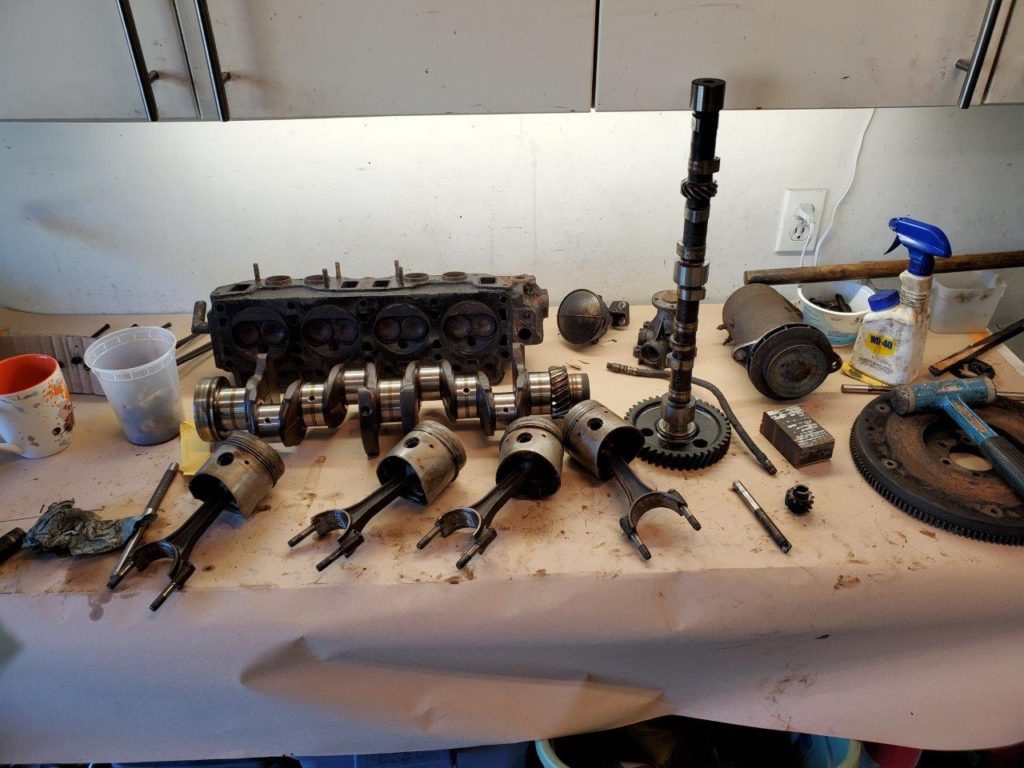
There are an amazing amount of parts inside an engine!

Empty block on its way to machine shop.

A closer look in the bores revealed a minor edge in the surface and this is enough to justify boring. The first oversized size in pistons for the B18 is 0.020 thousands of an inch.

Valves are removed from the head using a spring compressor. I only had a motorcycle compressor and it could not handle the stiff automotive springs.
I welded reinforcement bars to the unit and now it worked great.

This is what valves look like when you drive like a wuss! Massive carbon build-up! Moral of the story: punch it!

In order to get a good result when “tanking” the block its a good idea to remove the freeze plugs. This way it cam be cleaned throughout.
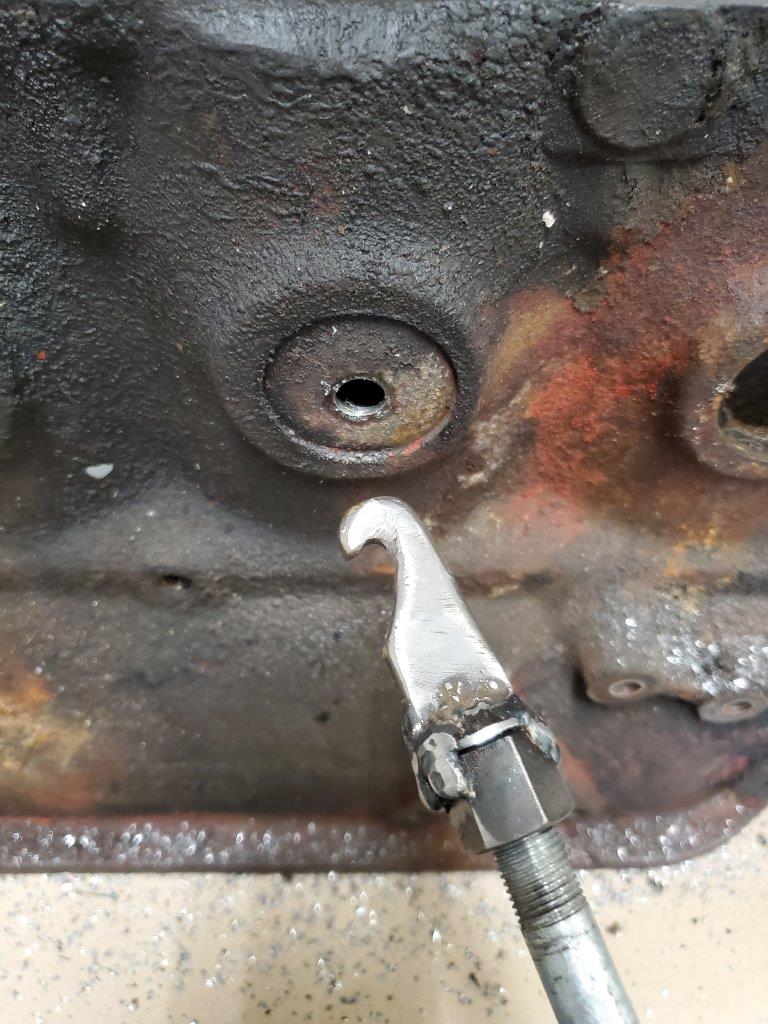
I made this hook tool to attach to a puller. I just drilled a hole and inserted the hook. This made it easy to remove the freeze plugs.
Here you can see why it is good to remove the freeze plugs. Lots of crud that can now be cleaned.
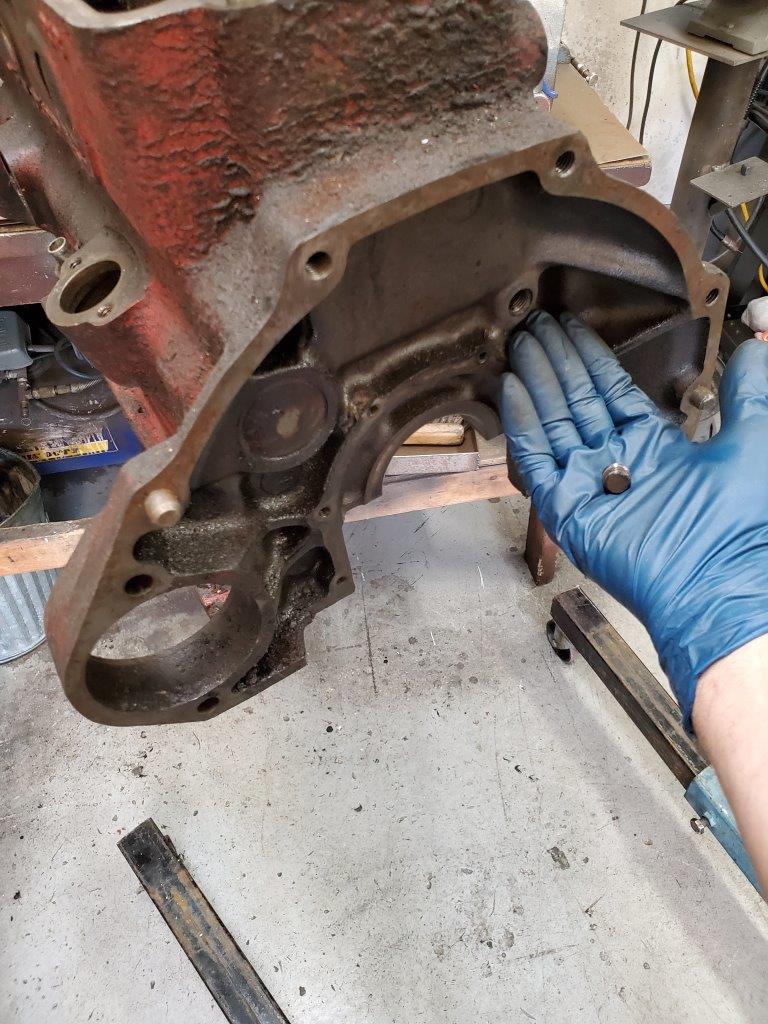
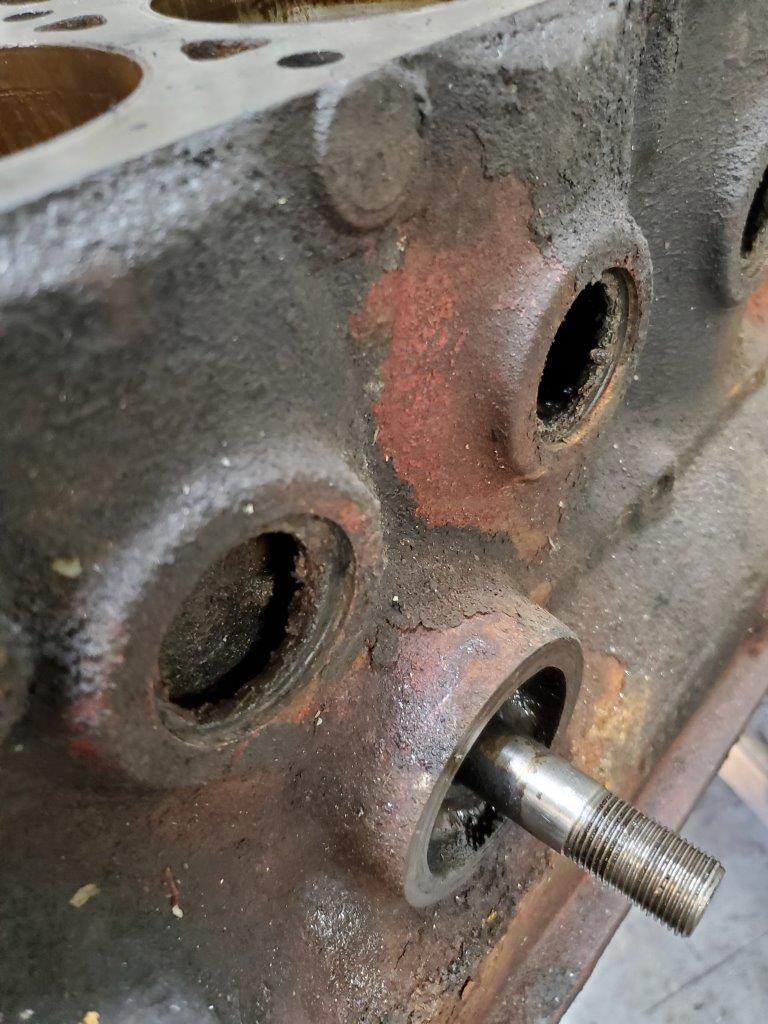
Also, there is a plug in the back for the oil gallery. You heat the plug (not the block) red hot and then use a 1/4 inch square drive to remove. This allows for the oil gallery to be flushed out. There is a corresponding plug in the front of the block as well.
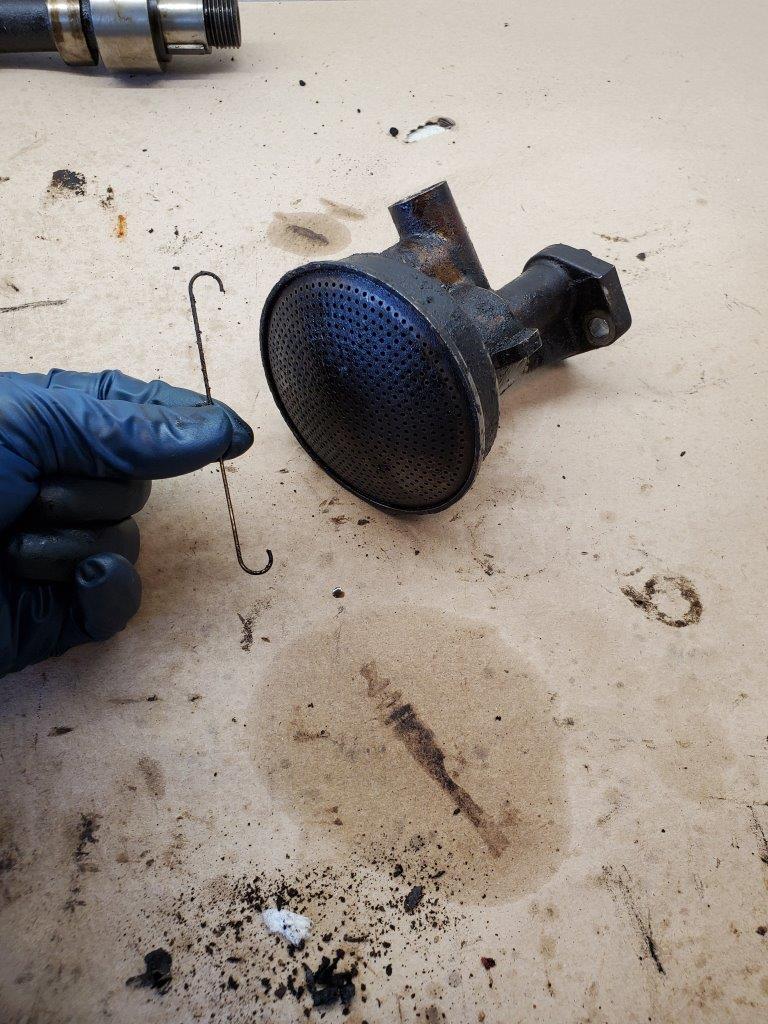
The oil pump is dissembled by removing this steel wire that holds the screen.
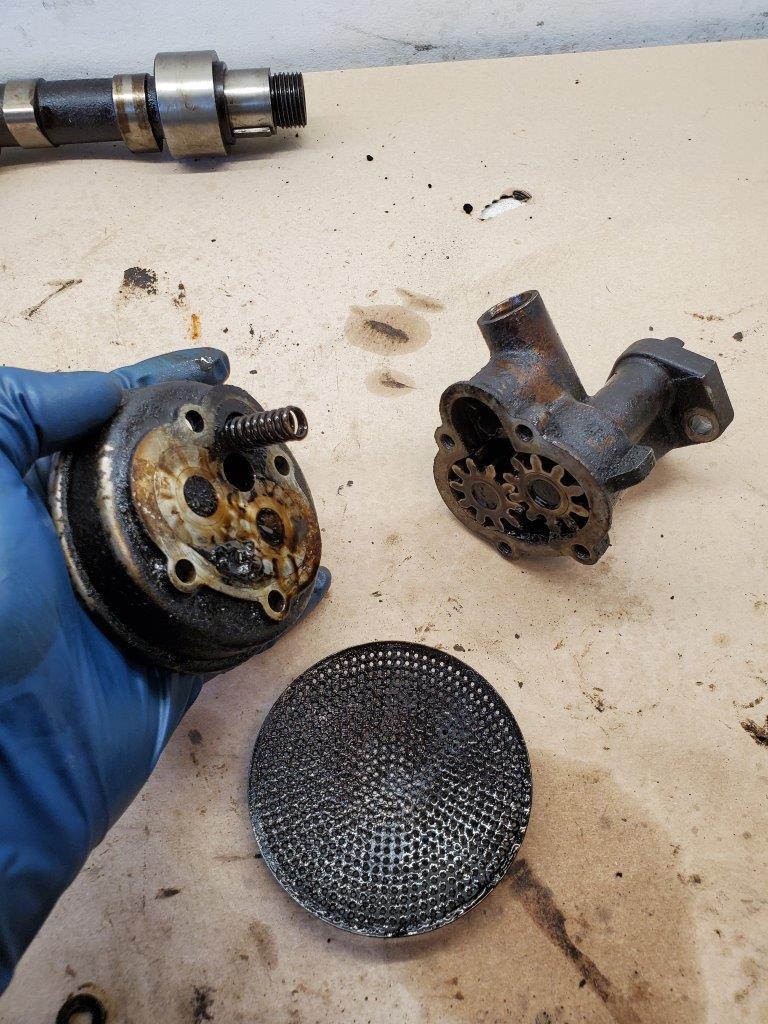
Four bolts holds the screen housing and once removed you will see the pump gear. Inside you will find the gears, spring and ball working as a check valve. I will check the specs on this pump but I may just opt for a high volume pump instead.

My best friend right now, a six liter ultrasonic cleaner. From Wikipedia:
“The unit generate electrical signal oscillating at ultrasonic frequency. This creates compression waves in the liquid of the tank which ‘tear’ the liquid apart, leaving behind many millions of microscopic ‘voids’/’partial vacuum bubbles’ (cavitation). These bubbles collapse with enormous energy; temperatures and pressures on the order of 5,000 K and 135 MPa are achieved; however, they are so small that they do no more than clean and remove surface dirt and contaminants.“

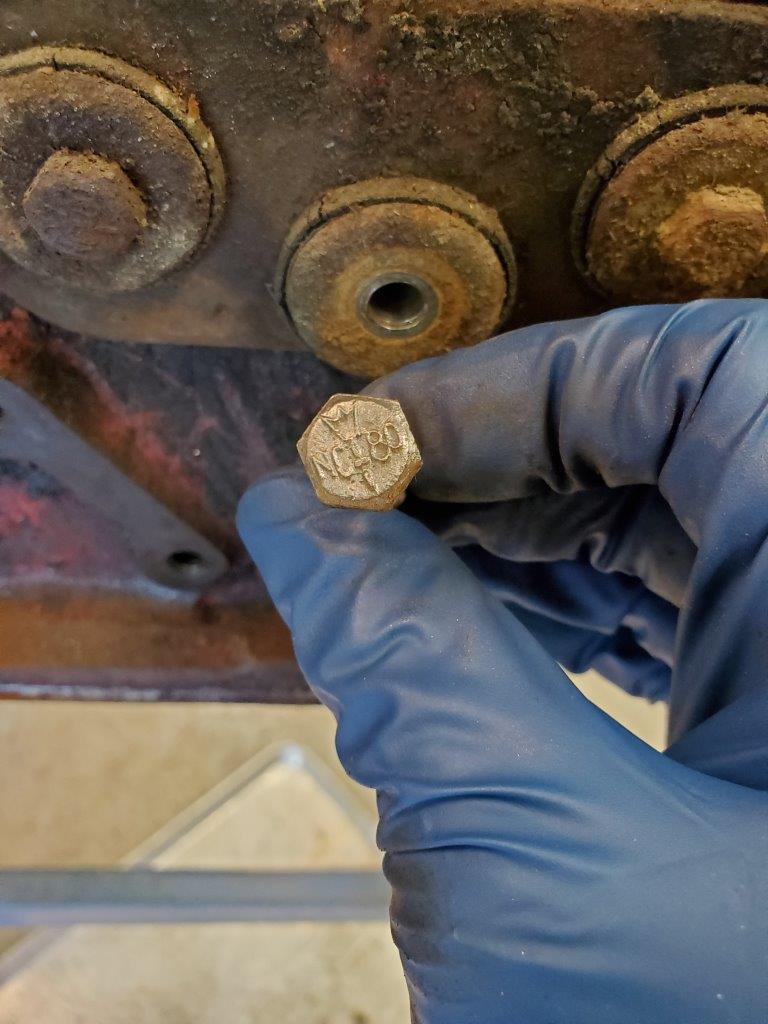
Disassembling an older engine or car can be quite a forensic journey. After cleaning the front engine pulley the rear revealed these quite ornate numbers for the pulley.
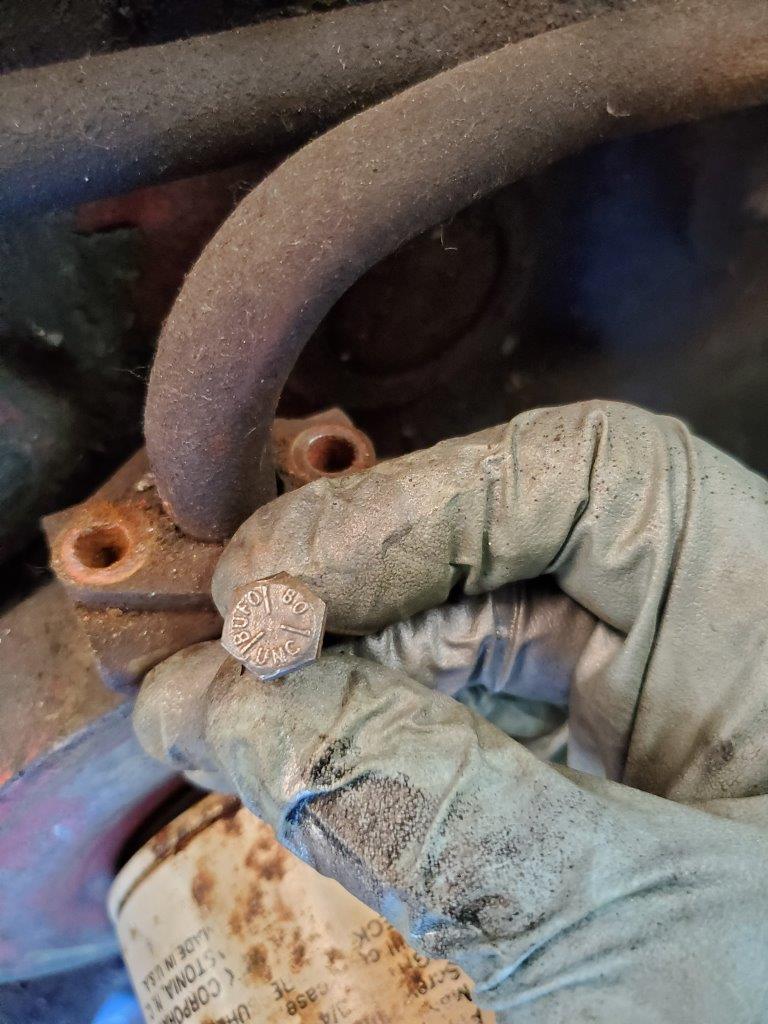
I am taking a ton of pictures during the disassembly of all the bolts removed. Some are BUFO brand as above, some are other manufacturers. I want the engine to go back just as the factory built it and that mean keeping track of this. BUFO was Volvo’s OE supplier and their hardware is still around today.
Generator bracket is held on by these bolts. I have to do some research to see where these came from.

The bottom ends on these engines are extremely stout. The early B16 had three main caps, the B18 has five. The journals on this crank were in excellent condition so they were just polished. Now I can use stock bearing sizes on the mains and rods. There is a reason the “red block” enjoyed such good reputation and lasted as long as it did. This block lasted until 1976 when it was redesigned for overhead cam.

The engine block after hot tanking. It is interesting to see the grinding marks on the block. Looks like someone took the time to clean up the casting as it came out of the mold. The bottom part shows some rough casting and I guess the grinding was for cosmetic reasons. This being an early blocks probably had some teething issues in the castings. I will leave all the rough castings for authenticity. The casting number 49680 followed by another “0” stamped on the riser makes up the part number 496800 confirming early 100 hp B18 sport motor. Later cars got 496801 engines being 115hp engines.
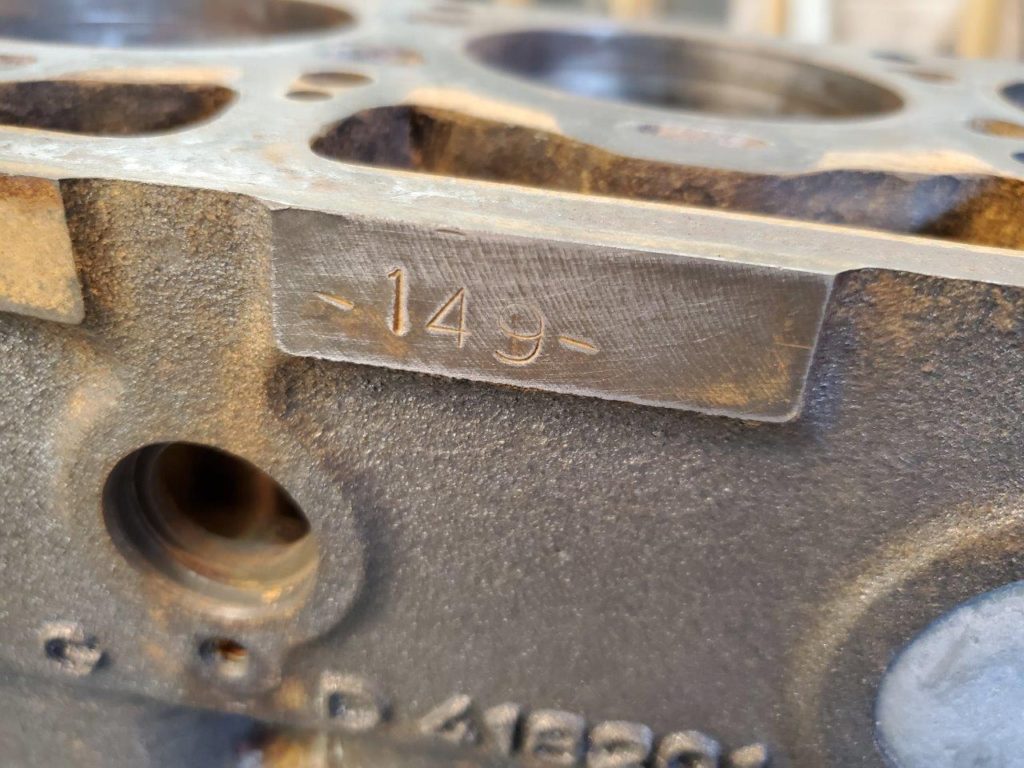
149 represents engine serial number. Of all the millions of B18’s made, this is the 149th production engine.
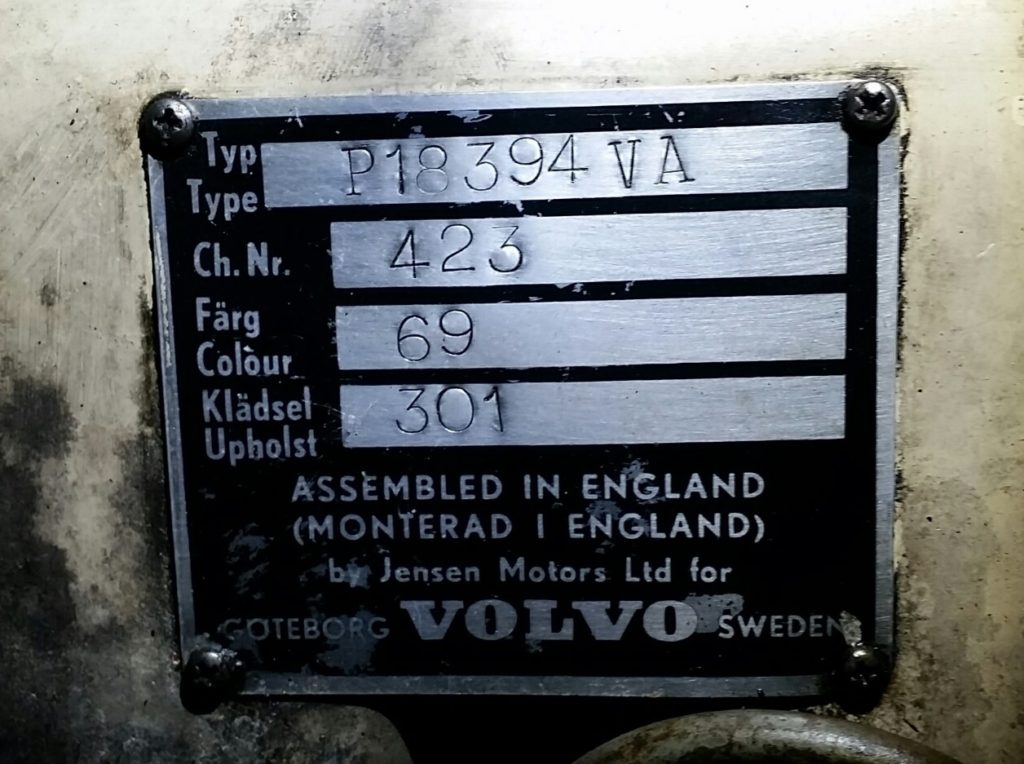
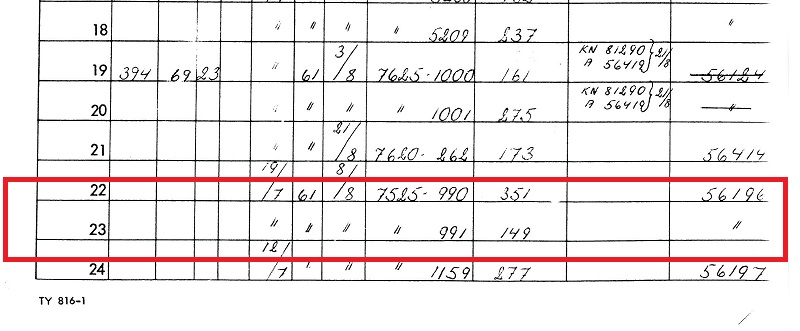
This car have chassis number 423. This is a part of the delivery information from Volvo in 1961. It shows the 400 series cars listed. So car 423 should have engine number 149. So this is the original block for my car so I better do it right!
Stay Tuned!
Editor’s Note: If you are interested in the story of this 1961 P1800 restoration, you can waste hours by clicking here.
By Rolf Åström