
I’ve heard of lower A-arms breaking on 1800 series Volvos before, but never upper A-arms! Well, there is a first time for everything, I guess, and when it happened on my 1964 1800 S, it was totally unexpected.
After having completed a right hand turn with some élan, the car decided to go in its own direction for a few seconds, with the left front tire almost hitting the center divider. I slowed down, and entered the turning area in the center of the street. Proceeding slowly, the steering felt okay — maybe it was just some oil on the roadway. Entering traffic again, and driving without sudden perturbations of the steering wheel, through turns and traffic lights, the car felt normal for the five or six miles which it took to get it home. Approaching my driveway, I decided to make a sharp right hand turn into it, just to see if I could duplicate the problem – and the car almost went off the pavement to the right.
Hmmm….. I stopped the car on the driveway, got out, opened the hood, looked at the suspension from inside the engine compartment, shook the left front wheel – everything looked and felt normal. Walking away from the car, I noticed that the left front wheel was at a peculiar angle – farther out at the bottom than at the top. I jacked up the front left of the car, and the problem became obvious.
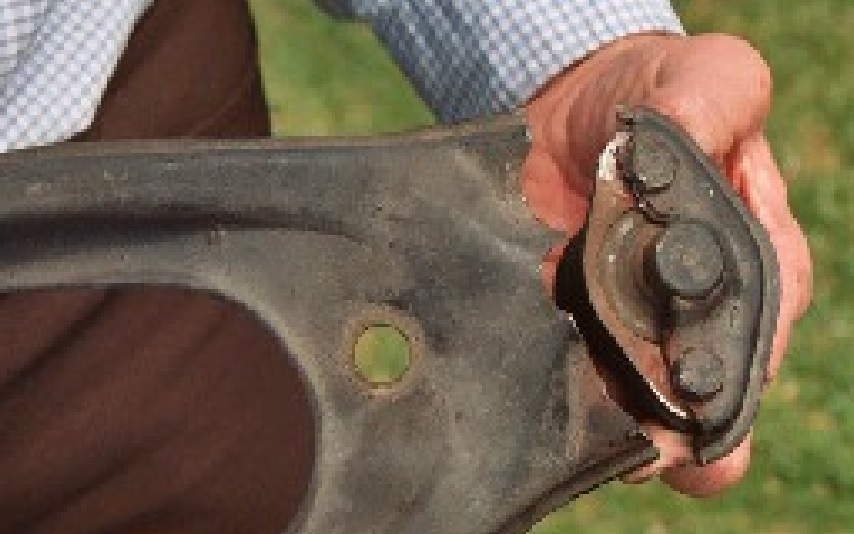
The upper ball joint, still connected to the steering knuckle, together with the outer end of the upper A-arm, had completely separated from the rest of the A-arm. It seemed incredible that I had even been able to drive the car all the way home! The only explanation I can think of is that the broken pieces interlocked somehow, and as long as the car was going in the same direction, everything stayed together.
Anyhow, I remembered that I bought a brand new A-arm and ball joint about ten years ago, and I knew exactly where they were in my garage (for once), so I had all the parts for a quick repair. As I recall, Volvo changed the configuration of the upper ball joint slightly for the later 1800s (and maybe the 120 and 140 series, too) in such a way that it would not fit on the old style A-arm. When ordering ball joint, make sure to let the dealer know the chassis number of your car or if you are getting a later style A-arm. The A-arm #671440 is no longer available from Volvo so you may have to resort to the used market.
By the way, the replacement of the A-arm is simplicity itself. Only two U-bolts connect it to the front member. If you have the time, it might be a good idea to replace the bushings inside the steel sleeve, which the U-bolts clamp on to — but that is another story.
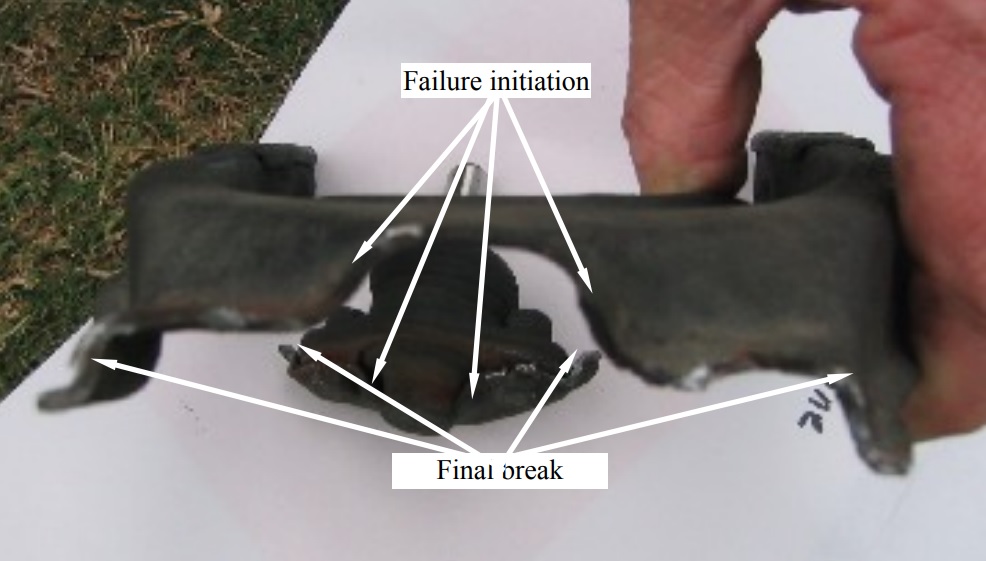
According to my manual, the U-bolt nuts are tightened to a torque of 14 – 18 ft-lbs. The ball joint is also simple to replace. There is no need for a ”pickle fork” to separate the joint from the steering knuckle. A single bolt in a groove on the ball joint shaft clamps it to the steering knuckle. The socket base of the ball joint is held with two bolts, with nylon locking nuts, to the A-arm. After replacing the left arm and ball joint, I removed the right wheel to inspect the right upper A-arm. Removing the paint on the suspect area, I discovered a hairline crack, starting on the rim of the clearance hole for the grease nipple. This is exactly how the left arm failure was initiated. As you can probably see in the photo, the break at the upper part, around the clearance hole is rusty, which means that the failure occurred a long time ago. The more recent failure is shiny. Also, you can tell from the striations at the break of the last portion, that it failed in fatigue.
If you have a high mileage old Volvo (1800, 120, or maybe 444/544) with the same configuration of upper A-arm, be sure that you, or your reliable mechanic, inspect it for cracks, every time the wheels are removed! That goes for the lower A-arm, too, by the way! With rust and/or paint accumulating over the years, clean up the area around the clearance hole and/or fine sandpaper (300 grit or finer so you don’t create any stress concentrations of your own), and inspect the area between the clearance hole, and both bolt holes, with a magnifying glass. If you see any cracking, replace the A-arm!
(Remember to have the front end realigned after you do any work on it). You may not be as lucky as I was, if either the upper or lower A-arm fails!!
by Goran Freske, photos by Jeff Peery and Ted Brough
Editor’s Note: Working on suspension is serious business, if you are not qualified to do this, seek assistance from a shop that can do the work for you.